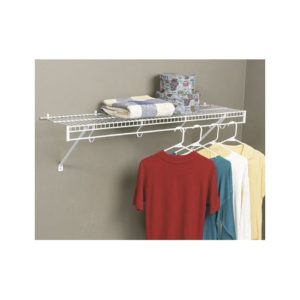
We were deciding whether to get more furniture or redo the closet in the baby’s room. While I’m somewhat handy, I definitely do not consider myself a big do-it-yourselfer. However, a year ago when we moved in, I did consider redoing the closet in our master bedroom. When we moved in, the house came with very basic closets. The closets consisted of a basic wire shelf from which you can hang clothes. Looking on Amazon, it looked very much like this rubbermaid product:
 While the closets set-up that way were functional, there seemed to be a lot of wasted space. Not wanting to spend a lot of money on redoing the closets, I searched around a bit last year and came across EasyClosets. I came across them because Costco had a promotion where you would get 25% off.
If you spend a few minutes on their website, you’ll find that it is very easy to design your own custom closet. The site is extremely easy to navigate. You just plug in the dimensions of your closet and their software will create a basic design for a custom closet. You can then adjust their design as you see fit. You can add more shelves, add drawers, add shoe racks, etc. Basically anything you could want in a closet is an option you can add.
Last year I also tried having one of their professionals design a closet for me. It turns out their professional’s recommendation was only slightly different from what the website initially designed for me automatically. At the time last year, as we had just moved into the house, we decided on holding off on redoing any of the closets. We had too many other things that really needed to be done and at the time we didn’t need the extra closet space.
Fast forward one year and a newborn later and we realized it would be nice to do something with the closet in the baby’s room. I again looked into EasyClosets.com but was disappointed to find out that they no longer offer the discount through Costco. They did let me know they offered a discount if your order is more than $1000. However, the baby closet just wasn’t going to be that costly (which is probably a good thing).
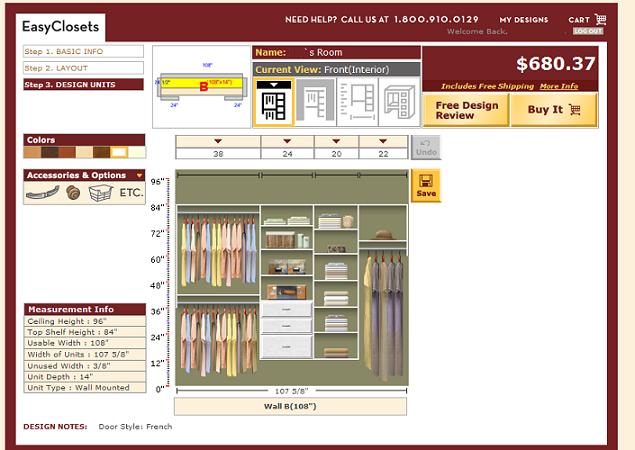
I measured the closet and entered the dimensions into the website. It is a standard closet with french doors. The closet was 108 inches wide which I’m thinking is wider than most standard closets. The initial design looked good but I did make some slight changes. I liked having drawers, although I was worried about how hard they would be to install. I also wanted to have some higher hanging and some double hanging. Here is how things looked once I made the changes I liked :
You can see the price came to just under $700. This did seem like a decent investment of money and energy as I was concerned about how difficult it would be to install. I read some reviews online and saw most people felt it was very reasonable to install. There was one very negative, dare I say hostile, review with complaints about how difficult it was to saw the metal hanging support. I thought the company’s response seemed reasonable and professional. I decided to go for it and placed the order.
Everything came exactly on schedule and in MANY boxes that were amazingly well marked. I have to say that I’ve never received anything this well marked before and it was great. Each box had labels on the outside clearly stating what was inside. This way I didn’t have to open every box as I went along to get the parts I needed.
I started by opening the box which had the instructions and found very clear, customized instructions for the design I had made. The overall plans seemed pretty straight forward, but it looked like it would involve a bit of work.
Before I could get started installing the EasyClosets system, I had to remove the wire shelf that was already there. Fortunately, it wasn’t that difficult for me to figure out how the supports were attached to the wall and it didn’t take too much time to remove it. The molly type wall anchors did leave some holes in the wall. I decided to use some putty that I had to fill in the holes. I didn’t bother to repaint the spots though as they were small and I knew that they would be mostly covered by clothes and items. You can still see the spots in some of my photos, but no one seems to notice them in real life.
Once I had the closet cleared out and ready for installation, the first step was to mark the wall with where the metal support would be located. The entire closet unit essentially hangs from a metal bar that gets attached to the wall. I first had to find where the studs were located in the wall. I first made a line across the back wall at the proper height, making sure it was a level line. I next had to locate the studs along that line. I had a stud finder which seemed to work pretty well at locating the studs. Finally, I had to mark approximately where the vertical supports of the closet unit would be located.
The metal support comes in a 72″ length, so I would need more than one for my closet. Rather than use a full 72″ support and then a 36″ support, it is recommended that the ends of each support are attached to one of the studs. I picked a stud near the middle of the closet and then measured the metal supports to the proper length to connect from the wall to that stud. I then cut the metal supports with a hacksaw. This is probably the most physically intensive part of the installation, but it really didn’t take me more than 10 minutes to cut each support. I did have an old hobby table that has a vice-like holder which did make cutting easier. However, I probably could have cut them just fine holding them with one hand and cutting with the other, or asking someone else to hold it firmly while I cut. The edges were not sharp and if they were, I could have always sanded/filed them smooth.
The only thing I would probably have done differently at this point was be more careful on where I cut the supports. There are alternating holes in the support – round then oval then round, etc. I wound up cutting one support just before the next hole. The result of having done this is that when I put the support up to the wall, the end of the support didn’t have a hole right near the end. As the ends of the support are supposed to be fastened to a stud I was worried that the screw going through the last hole wouldn’t reach the stud. Fortunatley, putting the screw in at a slight angle did reach the stud without a problem.
So, having cut the support I was now ready to hang the support to the wall. I fastened each end to a stud as recommended, and then fastened it wherever there were studs in between. They also recommend that you use their special molly like screws in any areas where a vertical support will be more than 6 inches from a stud, or if the end of the support is not able to reach a stud. I only had one spot that needed to use one of these special molly screws.
Here are some pictures of the support beam installed:
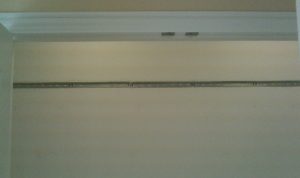
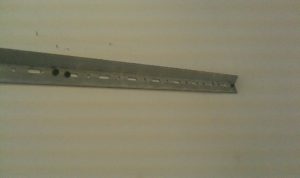

I was careful to make sure I had the support beam properly installed as I figured this was the most important step in the entire installation. Everything else came together very smoothly after this.
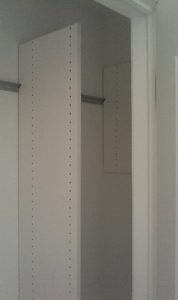
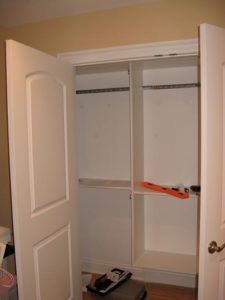
The next step was to hang the vertical supports onto the metal wall support. The vertical supports have a small notch that fits directly onto the metal wall support. It is very easy to lift and hang these vertical supports. There was a small insert into the directions saying that if you are hanging one of these supports directly over a place where you have a screw holding the metal wall support, you should use a hacksaw to cut out a little bit more space on the bottom of the notch for the screw head. I actually forgot to do this and it seemed the vertical supports were not being affected by the screw heads on any of my vertical supports. Hopefully there aren’t any long term consequences of this, but I would be very surprised if there were. The vertical supports don’t hang perfectly against the wall because the metal wall support is fairly thick. The vertical supports do hang with the bottom against the wall and the top just a fraction of a distance from the wall. Unless you look closely, you will not notice the slight gap. Here are some pictures of the vertical supports in their approximate places:
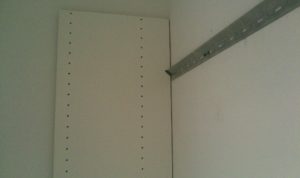
After hanging each of the vertical panels, you then add the support “cam” shelves. These support shelves attach to each vertical support at the top, above a hanging rod, and above and below drawers. These shelves attach by screwing a pin into the vertical support holes and then then the shelves have a locking cam that goes over these pins. You then use a screwdriver to turn the cam and it locks onto the pin. These were fairly easy to install. This isn’t the best picture but you can see a cam shelf on top attached to the vertical support on the right:
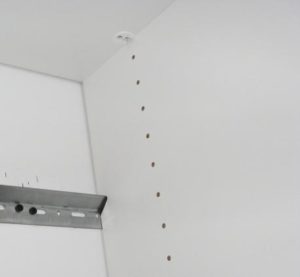
 And here is another picture showing the cam shelf, but here it is connected to the left vertical support:
Here’s some pictures of the structure now with the cam shelves installed:
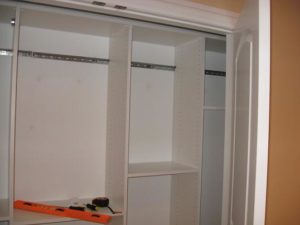
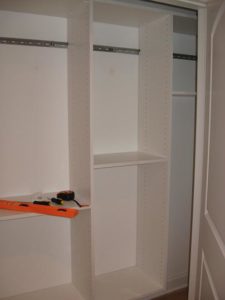
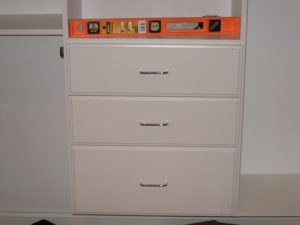
Once the support shelves were installed, it was time to assemble and install the drawers. The drawers all went together without any problems. I was worried about the drawers, but I had no problems at all. The drawers come mostly assembled, only requiring the front face to be attached and the tracks to be attached. I first attached the handle to the face with two screws. The face then screws onto the already assembled drawer box with two screws. You don’t fully tighten the face because you will need to adjust it once the drawers are installed to make sure the faces all line up. The tracks have a piece that screws onto the bottom of the drawer and another matching piece that screws into the holes in the vertical supports. The directions were fairly clear as to how much space to put between the different drawers and where to attach the tracks. At first I screwed the tracks into the drawer slightly 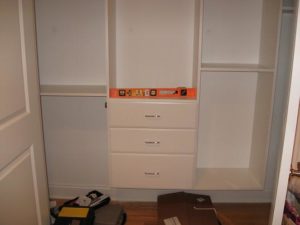 wrong – it is best to have the screws go in through the bottom of the drawer rather than the side to hold the track onto the drawer. If the screws go in through the side, then the screws may interfere with the track sliding. Putting the screws in the through the bottom avoids that problem. Once the face is attached and the tracks are installed onto the drawer and the vertical support, then the drawers just slide on. Once all of the drawers are installed, the face plates can be adjusted and tightened to make sure the proper space is between each drawer face and to make sure they all line up. In the end, I”m very pleased with the drawers.
 After the drawers, it was time to put in the rest of the shelves. They are very easy to install. You just insert little pins into the proper holes of the vertical supports and then rest the shelves on the pins. The hanging rods install very easily as well. The rods fit into two circular metal inserts. One insert has an opening on the top to slide the bar down. The rod inserts fit into two holes on each vertical support. You then just drop the rod into the inserts. We decided to adjust the rod down a little lower where the double hanging clothes go. We can do this because the baby clothes are small and it makes it easier to reach. When baby gets bigger, we will just move the rod up to the proper height.
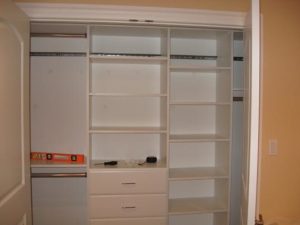

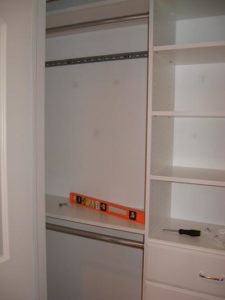
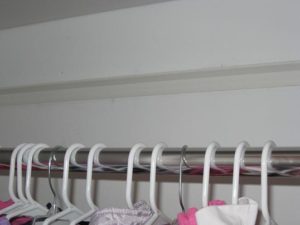
Once all of the shelves are in, the only thing left to do is cover the metal wall support. EasyClosets provides a plastic covering that you need to cut to fit between the vertical supports. I measured these to the proper width and then cut them with the hacksaw. The plastic cuts much easier than the metal support and I was done in a few minutes. I then snapped the plastic covering over the metal support. We then put our baby’s clothes into the closet and we are all done. Here are some pictures showing the plastic covering as well as the overall final look.

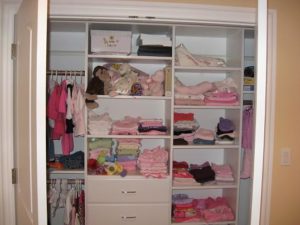

Overall I am very satisfied with the results. The product was exactly as I had expected. It was packaged amazingly well, the process went as described in the instructions, and there were no surprises. The final product looks great and I’ve gotten plently of compliments on the result. My guess is that the same product from a place like California Closets would likely have cost more than double what I paid, although it would have been installed by a professional. I give EasyClosets an overall grade of: A
If I were going to redo any of the other closets, I would use EasyClosets again. I do wish I could have taken advantage of the Costco discount they were offering last year, but I am not aware of any good competitors for this price that offer the same high quality results.
Thanks for the review! Extremely helpful in making my decision to try them out…especially after reading the same bad review you mentioned in your post.
Do you work for Easy Closets?
I have no affiliation with Easy Closets. I wouldn’t mind if they’d give me a discount on future purchases, though, as I’d like to do at least two more of our closets.
thank you!
We’re nearing the end of construction on our home and the move in date is approaching so we needed to get to work on the bedroom closet spaces.
I’m in the final stages of double checking my measurements on the four closets I’ve just designed on Easy Closets with some last minute tips and help from a representative over the phone. We had one area where a duct took the ceiling down and the measurements needed to be customized in this closet. Representative I spoke with named Scott, he was very helpful and answered a the few questions we had, otherwise the web site is very easy to navigate.
Next step is to re-check my measurements then to place the order. Your email helped me to see a reach in closet that had deeper returns on each side, as the online photos seem to show less return space. Without this visualization it can be hard to imagine if this side space can be easily accessed.
Your closets look great, well done!
Thank you so much for taking the time to post such a detailed review. This really helped us make the decision to go with this company!
Easyclosets used to be a good value before their latest price increase. The prices are nearly DOUBLE what they were a month ago. Time to start shopping competition.
Are you able to say how much that cost?
Keep in mind this was 6 years ago, but it was around $700. One of the above comments does mention the prices doubled around 2013. I could probably check and see what the same order would cost today, but I don’t really think it would add to the discussion. It is easy enough to go to their website and create your own mock-up and see the cost. I still have not redone my other closets. I haven’t really needed to. If you know of any other good options for closets, feel free to share here.
Thanks so much for your reply! I think I will look in to it. Everything has gotten more expensive years. I guess it is what it is unfortunately… That still sounds more reasonable than a never-built-anything-in-her-life trying to come up with a quality system herself. hah. Now where to find the money….
Just curious on how they are holding up after a few years of use? Do you use them a lot and do they still work and look good? Thanks!
Use them every day and not a single problem. Look as good as new. If I get a chance I’ll post an updated photo.